
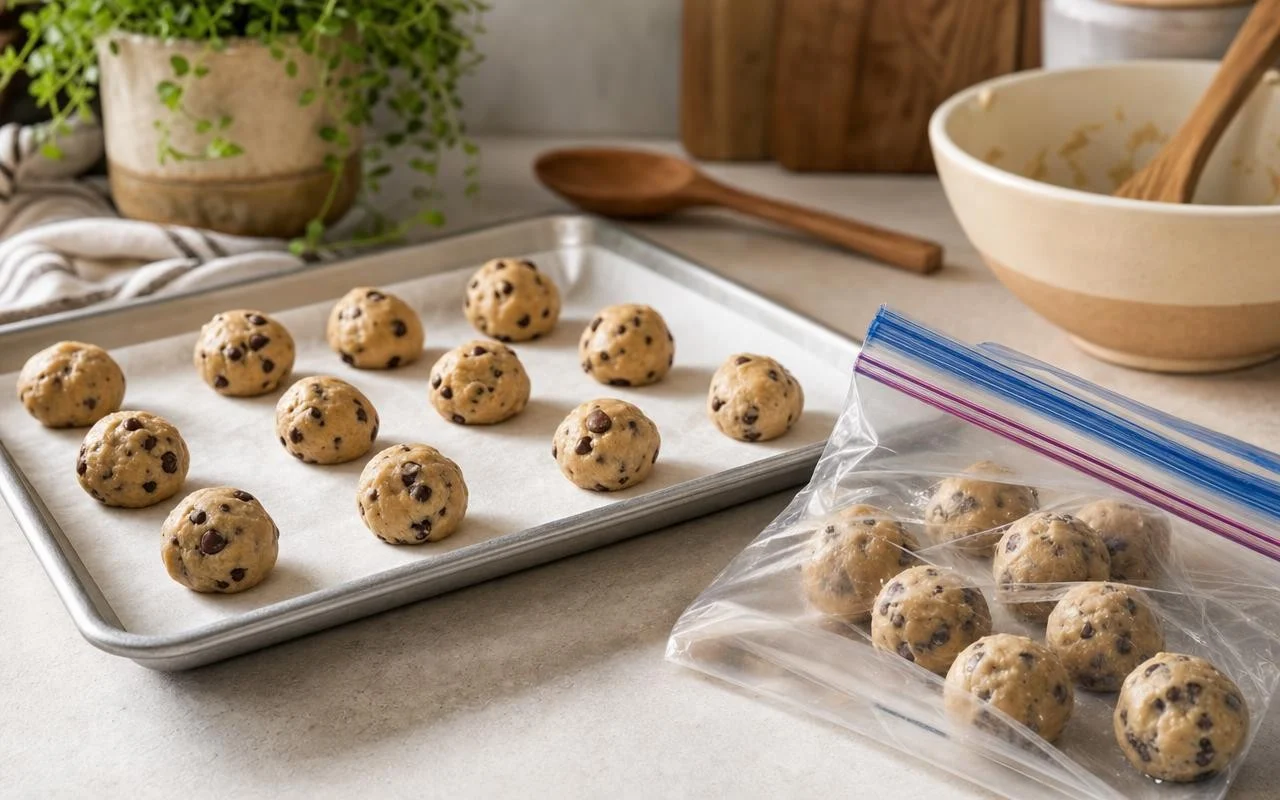
An improvised snack, guests arriving, a craving for something sweet after dinner… but no energy to weigh, mix, or shape. Many households recognize this scene. The solution exists: prepare a batch of dough in advance, then freeze the cookie dough in portions in a freezer bag to always have cookies “ready to bake” on hand.
This act of organization appeals to both busy families and batch-cooking enthusiasts. The storage recommendations from FoodSafety.gov and the FoodKeeper app, developed by the USDA Food Safety and Inspection Service in collaboration with Cornell University and the Food Marketing Institute, show that well-stored dough retains its quality for a long time. The question remains how to portion and store this dough so that the freezer becomes your best ally.
Why freeze cookie dough in portions in a freezer bag
Freezing the dough in a block forces you to thaw the whole mass, with risks of waste and a texture that is less pleasant. By forming individual balls, each ready to bake, you remove exactly what you need: 2 cookies for a coffee, 8 for an afternoon snack, 12 for a birthday. The shaping is done once for all, as is the cleanup. On the day, simply preheat the oven and line up the balls—the time saved is immediate.
From a safety and quality standpoint, the approach rests on solid foundations. FoodKeeper, accessible via FoodSafety.gov, serves as the official reference: supported by preservation charts from American health services, it indicates a freezing duration of about 2 months for cookie dough. The Illinois Extension notes up to 3 months of optimal quality at 0°F, roughly -18°C, the target temperature of a home freezer. Some culinary media extend to 4 months, but the core idea remains: individual portions, well wrapped, stored at -18°C.
The simple method to freeze cookie dough balls in a zip bag
The equipment is simple: a baking sheet, a sheet of parchment paper, and a zip-top freezer bag of the Ziploc type. Start by preparing your usual recipe, then shape regular spheres with a ice cream scoop or a cookie scoop. Space them on the sheet lined with parchment to avoid contact, then slide the sheet into the freezer for 1 to 2 hours of pre-freezing, or 4 hours for very firm balls.
In practice, the checklist boils down to a few key steps:
- Shape dough into uniformly sized balls.
- Arrange them on a parchment-lined sheet, without touching.
- Let them harden in the freezer until solid.
- Quickly transfer the balls into a zip-top freezer bag, removing as much air as possible.
- Label: type of cookie, date, oven temperature, and bake time “from frozen.”
Shelf life and baking of frozen cookie dough balls
To stay within a comfortable window, many specialists recommend using the dough balls within 2 months, in line with FoodKeeper data. The Illinois Extension mentions 3 months of optimal quality, while some cooking sites talk about possible use up to 4 months if the freezer remains steady at -18°C and the bag is well sealed, without excessive frost. In practice, many households finish their bags well before these limits, as the system proves so convenient.
On the baking side, the good news is captured in one sentence: no need to thaw. Place the dough balls still frozen on a parchment-lined baking sheet, and bake in a preheated oven as per the original recipe. Some culinary media advise lowering the oven temperature by about ten degrees and adding a few extra minutes; French sites simply suggest adding 1 to 2 minutes of bake time. It’s up to you to adjust on a test batch, then note it on the bag. By preparing small bags for batches of 4, 6, or 12 balls, every craving for homemade cookies becomes a ready-to-enjoy treat in roughly fifteen minutes.
