
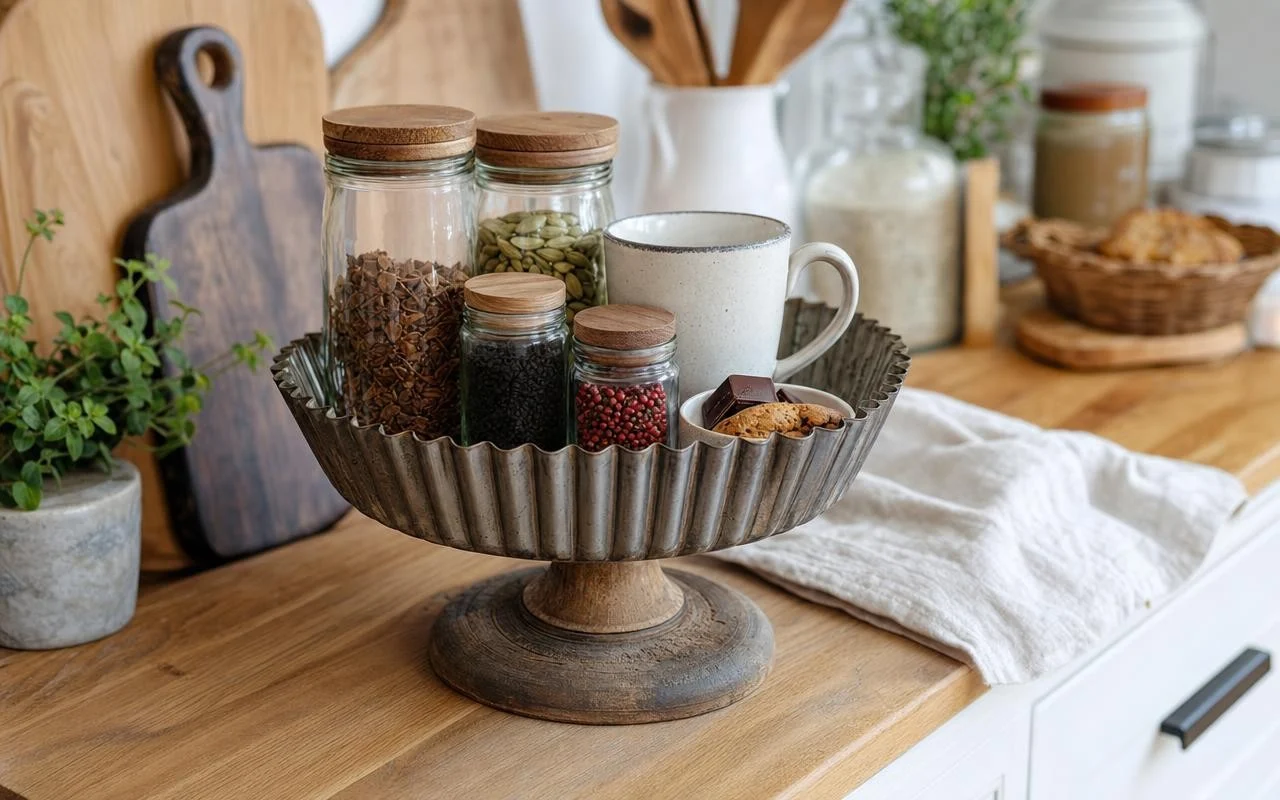
Kitchen countertops fill up quickly: bottles of oil, pepper mills, tea boxes, little snacks for the kids… We stack rectangular boxes, add a shelf, and the whole setup ends up practical but not very decorative. On the other side of the cabinet, there sometimes lie old, somewhat scratched cake molds that we no longer dare to use in the oven.
Between these two realities hides a clever idea: transform this forgotten mold into a rustic freestanding tray, both decorative and ultra-functional. Vintage and upcycling enthusiasts have grasped it well; this little DIY instantly changes the silhouette of the countertop. A simple mold then becomes a pedestal that catches the eye and gathers daily chaos.
Why a cake pan makes a great countertop organizer
A round cake mold immediately creates a different shape amid the boxes and appliances. Placed on a stand, it becomes a raised tray that brings together at one place salt, pepper, oil, vinegar, or herb jars. Round molds typically measure between 15 and 25 cm in diameter, a size ideal for accommodating everything that lingers near the stovetop without taking up all the space.
Another advantage: by elevating objects, you visually free up the countertop and make cleaning easier. Le Journal de la Maison reminds us in its kitchen decor coverage: “Charm often comes from the objects we already own,” a line that nicely sums up the spirit of this DIY pedestal tray with a cake pan. We hunt, repurpose, and end up with a unique piece that doesn’t interfere with daily life.
DIY rustic tray with mold + candlestick: materials and key steps
The good news is that this project requires little material and very little technique. Here is the baseline to gather:
- An old round cake mold, preferably as wide as possible;
- A fairly heavy candlestick or candelabrum, with a wide and stable base;
- A strong adhesive suitable for metal (and for the candlestick material);
- A spray can of metal paint, hammered or matte finish depending on the style;
- Fine sandpaper for a light sanding;
- Optionally decorative adhesive paper for the background.
Start by thoroughly degreasing the mold, inside and underside, to remove old traces of butter or cake. A light sanding of the area where the candlestick will be glued strengthens the grip. Find the center of the mold, apply the glue to the top of the candlestick, then press it against the underside of the mold, holding for a few moments. Then simply respect the indicated setting time, without moving the assembly. For stability, a heavy candlestick with a wide base remains the safest option; small non-slip pads beneath the foot can also secure the piece on the countertop.
Personalize your rustic tray and ideas for daily use
When the glue has fully dried, it’s time for the finishing touches. A coat of spray paint unifies the mold and the stem. Hammered metal effect for a chic country vibe, matte black for an industrial look, off-white for a more romantic kitchen: the choice is yours. You can also paint the mold and leave the candlestick raw for contrast. An adhesive paper on the bottom of the tray, in retro tile patterns or floral motifs, adds an easy-to-change graphic note.
This upcycling approach resonates with creators like Marine Derien, founder of “Mine de rien”: “I enjoy repurposing objects so they take on a new life,” she explains, championing the idea of “participating in environmental action in my own way, by making something beautiful out of something less beautiful.” On your finished tray, you can create a coffee station (sugar jar, pods, spoons), group your everyday spices, or make a snack corner with cereal bars and fruit for the kids. It also works as a pure decorative piece, with a small wreath of greenery and a few candles. And for tiny kitchens, some crafters go further by stacking two molds separated by a central candlestick, creating a two-tier tray that’s still easy to move for cleaning the countertop.
Sources
- JLM
“These 11 vintage décor ideas for the Christmas kitchen change everything this year, but we always forget this detail”
