
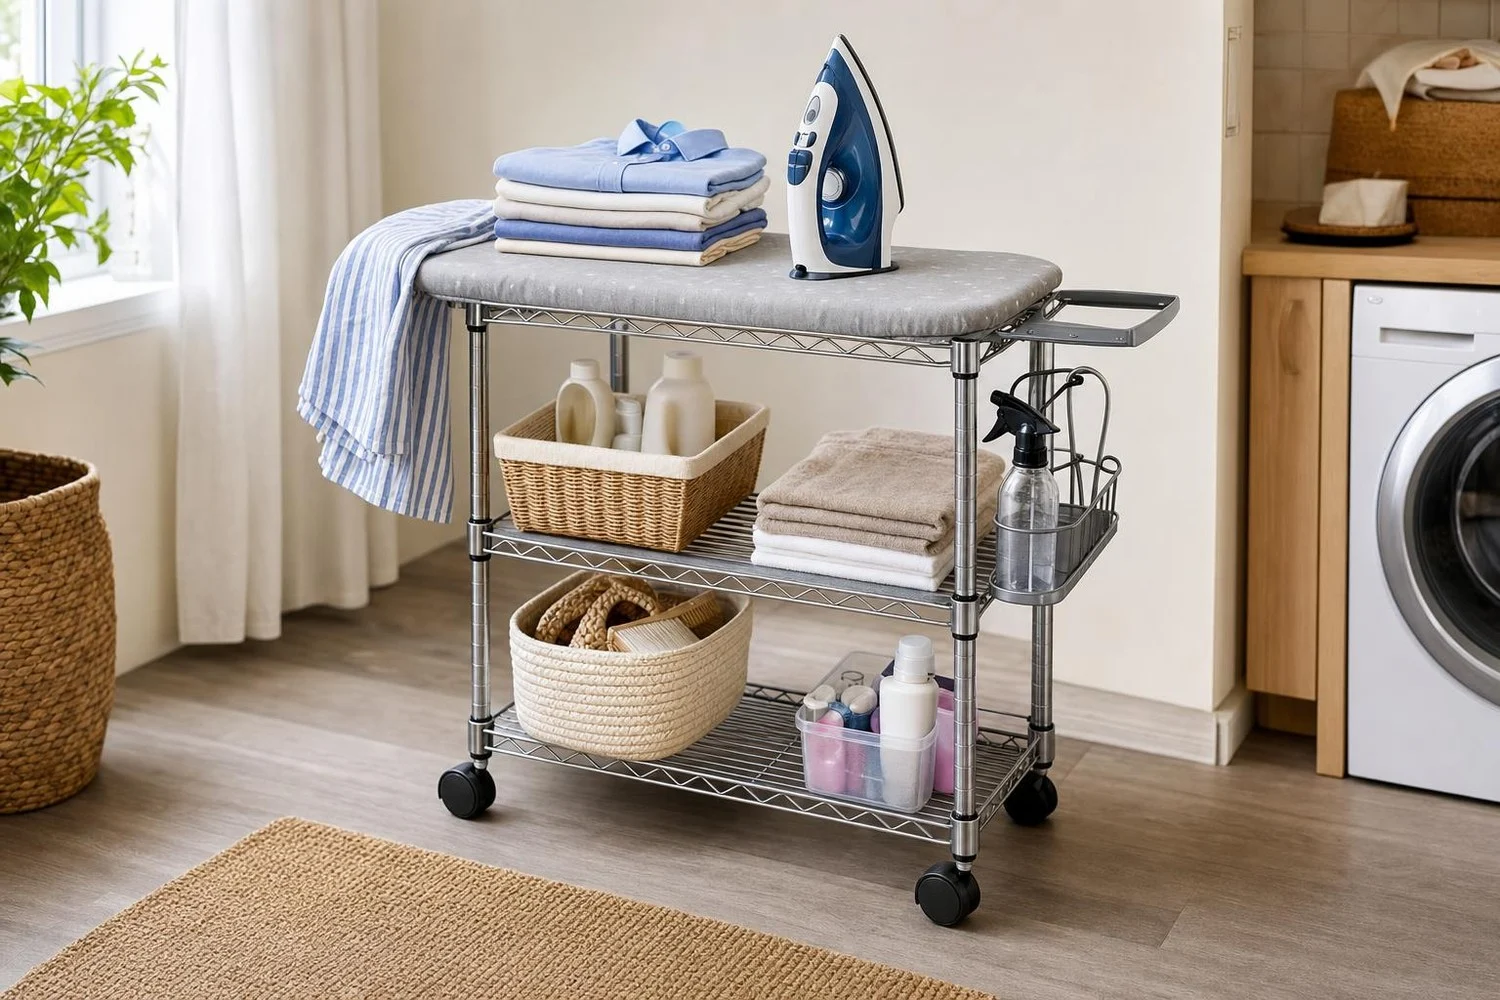
Taking out a large ironing board to press two shirts, many give up just thinking about the beast that gets stuck in the closet. Bulky, heavy, unstable, it often ends up hidden behind a door. Do-it-yourself enthusiasts have found a much smarter trick: repurposing a simple metal wheeled cart into a portable ironing table.
The principle, popularized in 2025 by the site House Digest and then by several IKEA hacks, is very simple: attach a mini ironing board to the top surface of a three-tier wired cart. You obtain a stable ironing surface on top, and two storage shelves underneath. According to IKEA Hackers, a version with an RÅSKOG cart and a mini board costs between $60 and $90, i.e., about €55 to €85.
Why this DIY metal cart portable ironing station changes the game
Instead of a large board folded away in a corner, you keep everything ready to use on a compact cart. It can be parked in the laundry room, in a hallway, or behind a sofa, then rolled to the nearest outlet. Transforming this cart into a mobile ironing station also allows you to gather iron, a spray bottle, and laundry products in the same place, saving time with every session.
The required equipment remains very limited, which makes this project accessible even in an apartment without a workshop.
- A three-level wired metal cart, preferably with lockable wheels;
- A mini table ironing board;
- A screwdriver;
- Four plastic zip ties;
- Optionally, two small wooden boards and four countersunk screws for a plastic-free mounting.
Steps to transform the metal cart into a portable ironing table
For the quick version, follow the method detailed by House Digest. Start by unscrewing the top tray of the cart, then reattach it in reverse: the rims end up at the bottom and the flat surface at the top. Then remove the cover of the mini ironing board and place the board at the center of the tray. By threading about four zip ties through the mesh of the tray and around the frame of the board, fix it securely, before cutting off the excess plastic. All that remains is to reattach the cover, and optionally remove the small feet of the board to gain a few extra centimeters.
For heavy use, some builders prefer a wood-and-screw fixation, without plastic ties. Two small wooden boards are first screwed to the inside of the tray, from underneath, with two countersunk-head screws so nothing protrudes. The mini ironing board is then screwed onto these spacers, still with two screws, which makes it bonded to the cart even during frequent movement. A quick visual check ensures the surface remains perfectly horizontal before tightening the final screws.
Safety, organization and variations around this mobile ironing station
To use this station safely, it is best to choose a cart that is sturdy enough and adjust the height so that the surface lands at a comfortable level for your stature. Before each session, lock the wheels, ensure the floor is flat, and keep stain removers, detergent, or spray cans away from the hot zone.
The two lower levels are then used to centralize everything: iron, spray bottle, damp cloth, scrubbing sponge, pressing cushion, but also a basket for clips, stain remover or laundry-detergent dose. Some tutorials using the RÅSKOG cart add a lid and hooks to hang hangers and covers. The result remains the same: a discreet cart that transforms into a ironing corner as soon as you roll it.
