
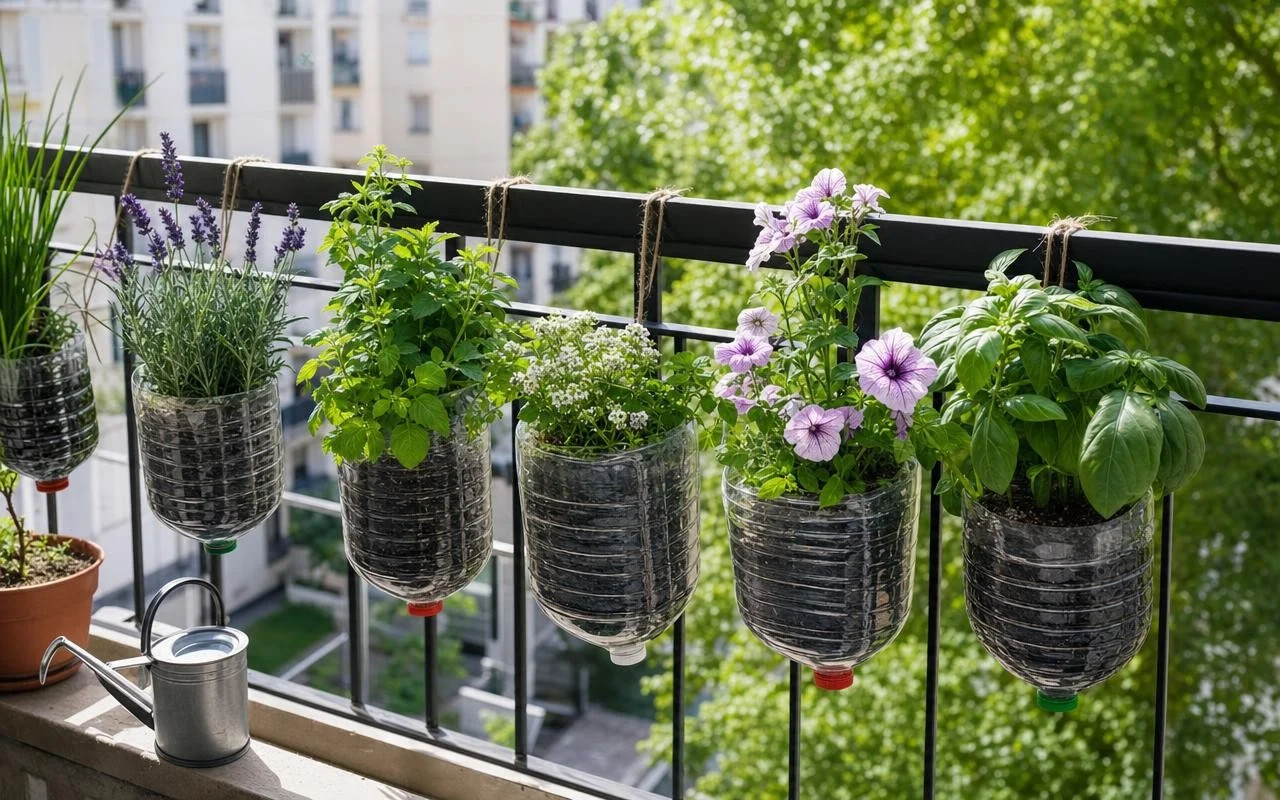
Yogurts, laundry, water bottles… Once empty, these plastic containers are often discarded directly into the trash. They end up in landfills, already saturated by millions of tons of plastic each year, according to the U.S. Environmental Protection Agency. Yet these everyday wastes can be transformed into pretty hanging planters, perfect for greening a balcony or a corner of a terrace.
This repurposing has everything going for it: zero purchase, very little material, an immediate space-saving effect, and a gesture that reduces waste, in line with ADEME recommendations. In about ten minutes and without spending a single euro, a simple plastic bottle can become a hanging planter worthy of the most beautiful flowering balconies. And the most enjoyable part comes with the choice of plants.
Choosing the Right Container for a Plastic Bottle Hanging Planter
The most practical formats remain the 1- or 1.5‑liter bottles, light yet sufficiently deep to accommodate potting soil and roots. Large food containers or laundry bottles, once thoroughly rinsed, offer more volume for more generous arrangements. It is better to favour a relatively rigid plastic that does not deform once filled.
Orientation changes everything. In a vertical position, a bottle pierced with multiple openings creates the illusion of a column of greenery, as shown by a technique popular on social networks with Tradescantia (often referred to as wandering jew). In a horizontal orientation, fixed to a railing, it behaves like a traditional planter and can be planted on both sides: upright plants on one side, trailing plants on the other for a “cascade” effect cited by many exterior décor specialists.
DIY Easy: Transform a Plastic Bottle into a Hanging Planter
For a spectacular version where the plastic nearly disappears, only a small amount of recovered materials is needed:
- 1 plastic bottle of 1 or 1.5 litres, well rinsed
- a cutter or sturdy scissors
- a tool to punch holes (heated metal point, small drill bit)
- zip ties or a sturdy string and a chain
- potting soil and, if possible, a few pebbles at the bottom
- Tradescantia cuttings about 7.5 to 10 cm long
Start by cutting small windows all around the bottle, in rows, leaving strips of plastic intact for strength. Slip the ends of the cuttings into these openings, towards the inside. Then fill the bottle from the neck, alternating layers of potting soil and new cuttings, right up to the top. To suspend the whole, fix three zip ties around the top of the container, evenly spaced, then connect them to a chain or to a suspension rope.
Plants, drainage and decor: tips for truly stunning hanging planters
Another very simple option, inspired by home tutorials: cut the bottle diagonally to obtain a half-shell, drill three or four drainage holes under the bottom, then two holes at the top to pass the string. The bottom of the bottle acts as a pot, the holes let excess water run off, and the suspension is made on a hook or directly from the railing. Some DIY enthusiasts even create a notch in the plastic and use the cap as a stopper to hang the planter on the guardrail.
On the plant side, trailing plants particularly highlight these recycled containers: geranium ivy, fuchsia, begonia or verbena create spectacular cascading blooms. Some specialized sources recommend planting three to five plants per suspension for a dense effect, pairing for example an upright plant with trailing varieties. On a balcony, you can alternate herbs (basil, mint, chives) and flowers to combine practicality and beauty. A few coats of acrylic paint on the plastic, a wrap in rope or jute around the bottle, and lining up several modules spaced about ten centimeters apart is enough to compose a true suspended green wall, all entirely from repurposed materials.
